OH no, you’re down to those precious few remaining drops of your favorite Pure Body Naturals beauty product! With each use, you scale back on the amount you take, and maybe even spread out applications, in hopes that you can last a little longer before having to throw the jar away. We’ve all been there. And any time an empty jar goes in the bin, avid recycler or not, you’ve probably wondered at least once if there’s anything more you could do with it.
Get ready to ignite your inner green goddess and DIY spirit with three pretty projects that will breath new life into your empty Pure Body Naturals containers. We’ve put together simple step-by-step instructions to make some really useful projects that you can do with the kids, at brunch with friends, or on a Friday night with a glass (or two?) of wine. Here’s we go!
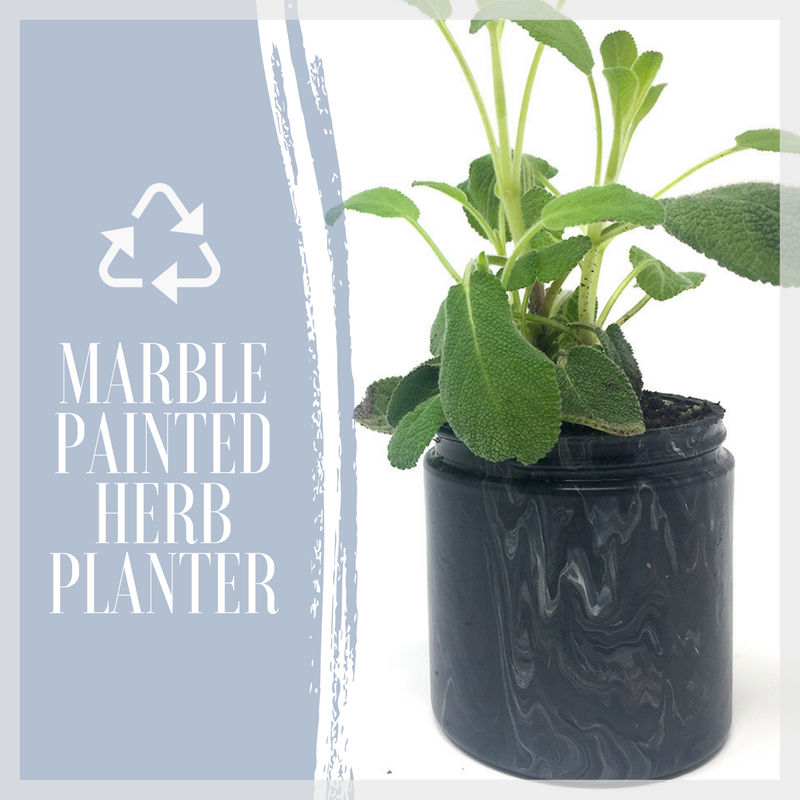
Marble Painted Herb Planter
Step #1: Remove any labels and clean the inside of your Pure Body Naturals container.
Step #2: You can paint the outside of your Pure Body Naturals container any fun color of your choice. We decided to go with a marbling technique using Martha Stewart Marbling Medium that we found online. The great thing about DIY’ing projects like these is that you can really do any form of painting, stenciling, decoupage, etc. and it will look fabulous. You can also skip this step altogether and go straight to the filling!
Step #3: Once you’re done decorating and it has completely dried, fill half of your container with a handful of small rocks. This will help extra water drain from the soil.
Step #4: Add your plant or seeds! We chose a Sweet Sage plant from Home Depot. If you are transferring pre-potted herbs, be very careful not to damage the plant’s roots when you’re moving it over. You may also have to discard some of the extra soil so that it fits into its new home. If you are starting fresh, add your soil and seeds to fill the container. If you want to take it a step further, here’s a great recipe to make your own organic potting soil.
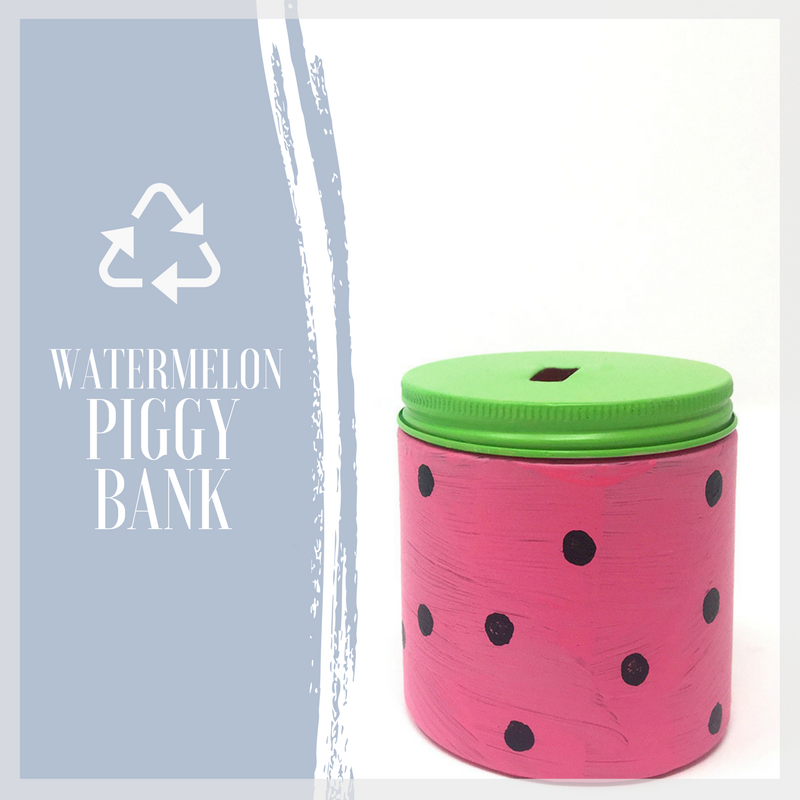
Watermelon Piggy Bank
Step #1: Remove any labels and clean the inside of your Pure Body Naturals container.
Step #2: To achieve this watermelon design, remove the cap and use a knife to cut a 1-2 inch slot in on the top. Paint your cap green and the jar bright pink. Once the jar is dry, use a Q-tip to blot small black dots around the jar to make the seeds! Always paint in a well-ventilated space.
Step #3: Let everything dry before putting the lid back on.
Step #4: Time to decorate! There’s a lot you can do to decorate your piggy bank. Some our favorite techniques include stencil, paint, or decoupage. We went with decoupage for this project, using tissue paper, but you could use magazine cutouts, scrapbook paper, or pictures that you print! Tear or cut enough paper to cover your container.
Step #5: As you lay the paper on, apply a thin layer of decoupage with a paintbrush or sponge. You can use a popular brand like Mod Podge or any brand from your local craft store. Continue this step until the container is covered or until you’re happy with it!
Step #6: Let everything dry before putting the lid back on.
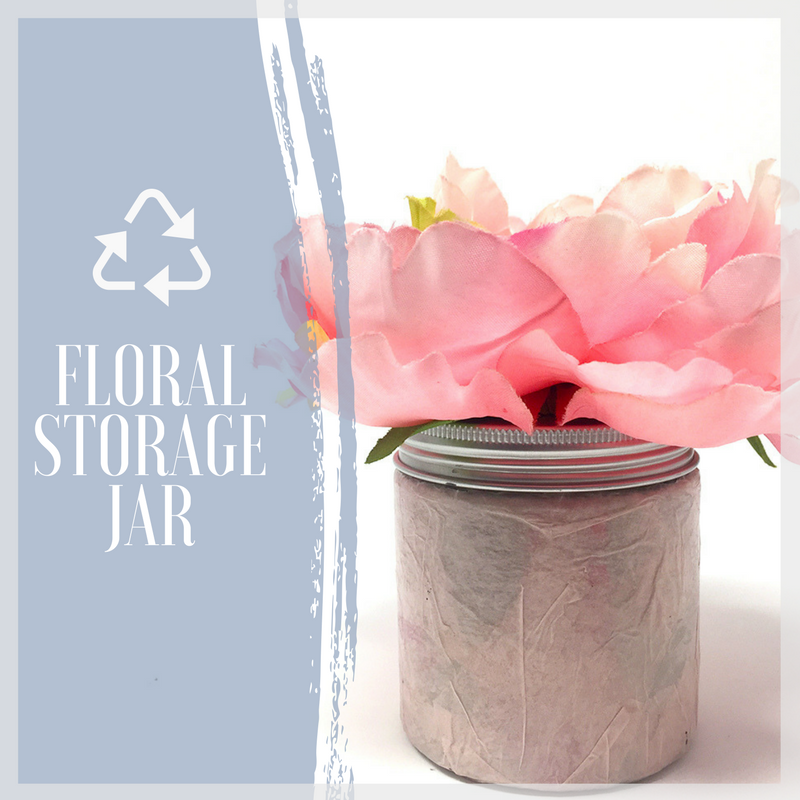
Floral Storage Jar
Step #1: Remove any labels and clean the inside of your Pure Body Naturals container.
Step #2: Time to decorate! There’s a lot you can do to decorate and personalize your jar and lid. Some our favorite techniques for the jar include stenciling, painting, and decoupage. We chose to use a light pink tissue paper for with decoupage, but you could use magazine cutouts, scrapbook paper, or pictures that you print! Tear or cut enough paper to cover your container.
Step #3: As you lay the paper on, apply a thin layer of decoupage with a paintbrush or sponge. You can use a popular brand like Mod Podge or any brand from your local craft store. Continue this step until the container is covered and you’re happy with it!
Step #3: While your jar dries, select a faux flower for the top of the lid. You can go with one big flower, or a bunch or smaller flowers. You could also use a doorknob, plastic figurine, or unique object and glue it to the middle of the container top. This will act as a decorative piece to your storage jar. We used a dab of Gorilla Glue because of it’s extreme holding power.
Step #4: Let everything dry before using to store your favorite trinkets and baubles!